
Make It Last: Skis and Snowboards
Posted by Garson Fields on 25th Nov 2020
Make it Last is dedicated to getting the most out of your gear. This is our place to share knowledge acquired over years of abusing outdoor equipment so you can learn from our experience and our mistakes. We want you to use your gear, patch it up until you can’t anymore, and enjoy it to the fullest. And when you finally need a new piece, we can help you with that too.
At times, it can seem like skiers and snowboarders are worlds apart, but despite the differences in the respective cultures, our gear has a lot in common.
Skis and snowboards are built using nearly identical construction, which means that the keys to maximizing their lifespan have a lot of overlap. There are a few key differences, but they mostly revolve around what you do before you even get on snow.
It’s reasonable to expect that well built skis, snowboards, and splitboards will last well over a hundred days on the hill. Unless you’re a snow-obsessed dishwasher or a gainfully unemployed ski bum, that means that your setup should easily last you a few seasons, even if you get out more often than most.
But as with almost anything, your gear will be up for early retirement if you overlook basic upkeep.
Top Line: making your skis or snowboards last is a matter of three main factors:
- Setup
- Style and Quiver
- Maintenance and Repairs
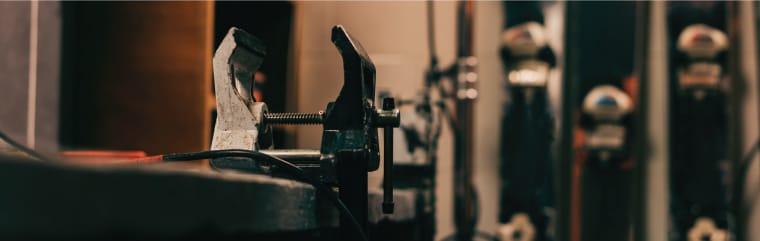
How to Set Up Skis
Top Line: Get your bindings mounted correctly

Unless you’re brand new to skiing, you already know that you need to have your skis drilled to mount your bindings. And as you’d expect, when you drill holes in your skis you make them weaker. It’s not an issue when those holes are occupied by binding screws, but any extra holes become points where cracks are much more likely to form.
We mention this because once you get your skis drilled, you’ll typically need to get them re-drilled if you want to change bindings or mount them in a different position fore/aft on your skis.
You’ll almost always want to mount your bindings at the reference position, but for certain styles you may want to deviate from those recommendations, especially if you do a lot of switch tricks.

Also, have your bindings mounted by a reputable shop. Your buddy may have a drill press and a jig, but we’ve seen brand new skis ruined enough times to appreciate that paying a professional is almost always worth the premium. It will cost more than a twelve pack for your buddy, but then again, there’s a pretty good chance they'll drain a few of those beers before getting to work, and the outcome occasionally reflects that. Disregard this advice at your own peril.
How to Set Up Snowboards
Top Line: Don’t use thread locker or grease on your binding bolts
Unlike skis, snowboards have threaded inserts installed from the factory, which makes setting up a snowboard pretty easy. It comes down to determining your stance width, finding a comfortable binding angle, and tightening a few screws. The only way to realistically damage your board during setup is to add either thread locker or grease to your screws.

Thread locker is indispensable for plenty of applications, but snowboards are not on that list. The problem is that if you use thread locker, your board’s threaded inserts can, and usually will, pull out of the deck the first time you try to remove your bindings. You might need to switch them for a different pair, or you may want to tweak your stance. Either way, even medium strength thread locker will make it highly likely that when you try to loosen your bolts, the threaded inserts will come with them.
Some people advocate greasing the bolts instead, but the stainless steel hardware included with your bindings won’t rust or seize. The only thing that grease will do is make it easier to over tighten your binding bolts, which, once again, will pull the threaded inserts out of the top of your board.
Instead, install your bindings with dry bolts, and make sure to use the correct sized screwdriver (#3 Phillips, in most cases).
Take a second to check your binding screws after your first day on the hill, and periodically throughout the season, to make sure they’re still tight. It only takes a minute, and it can save you the pain of damaging your board’s insert pack.
While you’re checking your bindings, take a moment to check the straps as well. The screws that hold your straps to your bindings are also prone to loosening, and catching that during routine maintenance can save you a lost strap and a tricky one footed run down the hill.
Why Do You Need More Than One Snowboard or Pair of Skis?
Top Line: Don’t ruin your best gear on early season days or jibbing in the park

Certain riding styles put more of a hurt on gear than others. Thin snowpack exposes rocks, which can wreak havoc on your gear. Similarly, jibbing is notoriously hard on edges and bases, as well as cores that get flexed, buttered, and pressed with every park lap.
That’s why experienced early-season skiers always have a pair of "rock skis," and park rats almost certainly have at least one dedicated setup for sessioning rails. If you don’t limit yourself to a single style, or you can't resist hiking your local hill after the season's first snow storm, you’ll get more life out of your skis and boards if you keep a quiver.
Maintenance and Repairs for Skis and Snowboards
Top Line: Fix base and edge damage before they become a bigger problem
There’s more to tuning than waxing, and the other aspects of tuning have a big impact on the longevity of your setup.
That said, while waxing is key to keeping your speed on the hill, we also recommend using a high quality citrus base cleaner to remove old wax and dirt from your base. You don’t need to do it every time you wax, but if your base is getting visibly dirty, hitting it with some base cleaner will restore the speed you’ve been slowly losing to contaminants in your base.

Why You Should Repair Base Damage
Finding a stray rock is an easy way to damage your base material, and not all damage is created equal.
Most base damage is superficial, meaning that whatever you landed on damaged, but didn’t penetrate, the base material.
In that case, you can easily address the issue by using a sharp razor blade to trim any hanging base material and filling the channel with PTex, which you can find at literally every ski shop on earth. Like waxing, there are plenty of resources available for guidance on PTex repairs. Our only additional advice is to take your time and understand the process start to finish before you get started. As long as you have all the needed items on hand, an effective PTex repair can be handled at home in just a few minutes.

Core shots are a different beast. If you've picked up a hole in the base that penetrates straight through to the wooden core, or you've damaged the base next to the metal edge, PTex won't give you a durable repair. Instead, you'll need a base weld, and you don't want to wait to get that handled.
Base welds are more involved than a PTex repair, so they're best handled by an experienced tuner. They're also time sensitive, because wood cores are intended to be sealed. Opening the core to the elements exposes it to water, and if your core starts to absorb water, it will ruin the flex characteristics, and in turn, the handling of your ski or board by causing a soft spot.

Unless you're already handy with metal grip and a soldering iron, base welds can be a comparatively pricey repair, especially if you’re on a trip and you need it handled overnight. Try not to get hung up on the price. A proper base weld will allow your boards to reach their usual life expectancy, saving you a lot more money in the long run.
Easy Edge Care
Much attention gets paid to sharpening edges, but deburring is a critical piece of maintenance that can seriously prolong the life of your gear.
Just about time you run an edge over a rock, the edge material will deform, causing burrs where the edge contacts the snow.

Not only are burrs detrimental to glide, they also make it more likely that your edges will get caught on the next rock they meet. And personal experience has shown that when edges catch, they will sometimes break. Repairing a cracked edge is extremely difficult and it’s not guaranteed to give good results, which makes deburring one of the most potent preventative maintenance tasks you can perform on your gear.
All you’ll need is a hand file. Find the offending burrs, and work slowly to remove them, checking the condition of your edge at each pass. You’re aiming to remove the high spots, and nothing more. If you’ve got a fully stocked tuning setup, you can resharpen after deburring.
Depending on where you ride, sharp edges may or may not be critical. If your local conditions skew soft and edgeable, or you’re tuning your dedicated park setup, you can usually polish the deburred spot with a diamond or gummy stone and call it good.
A quick note for those unfamiliar with hand tools: a file only cuts in one direction. Don’t press down and push back and forth, it doesn’t work the same way as sandpaper. For a file with a handle, it will cut when pushing away from you. If you’re using the small section of file included in most edge tuning kits, make sure to run your fingers across the file to identify its cutting direction before you get to work.
When To Retire Your Skis or Snowboard
Top Line: Gear wears out, and when it does, handling suffers
There are two big reasons that you’d want to retire your setup, other than your bindings being so old that a ski shop legally can’t adjust them (which is a real thing, in case you weren’t aware).
Skis and boards should be replaced when they’re worn out or broken. And while a break is easy to diagnose, identifying a worn out setup requires some experience.
Depending on construction, skis and snowboards can last anywhere from a few dozen days to a few hundred before they really start to soften up. Most freeride and all mountain setups will last a long time thanks to their stiffer construction and additional reinforcements. Softer freestyle setups and entry level planks are more prone to accelerated wear.
Fatigue in the wooden core, as well as the breakdown of the adhesives that hold everything together, contribute to your setup losing its spring, which reduces edge hold and the overall responsive feel that you get when you start pushing.
If your setup is starting to feel unresponsive or “dead” underfoot, where it once felt “lively” or “energetic”, you’re getting due for a replacement. Since this is a progressive condition, you’ll have to evaluate based on what you’re feeling when you drop in. Developing a feel for this takes some experience, so if you’re unsure, borrowing or renting something comparable to compare back to back can make it easier to feel the difference.
Given the gradual nature of the degradation, it’s worth considering what your goals are for the season before you rush out to get some new gear. Especially if it’s late in the season, you can save yourself a few hundred dollars by shopping for a replacement in the summer, when last year's models can be had at deep discounts.
Unlike progressive wear, breaks are easy to diagnose. Perhaps the most common is delamination, which occurs when you run into an immobile object like a tree or a submerged rock. If hit hard enough, the compressed layers will separate.
If your topsheet is separating from the base, it's time to start shopping. We’ve witnessed friends using epoxy, woodworking clamps, and patience to “fix” delaminations, but have yet to see a single instance of this type of fix lasting more than few more days. Once a ski or snowboard delaminates, it’s game over.
The other fairly common issue is snapped cores. Skis and boards act as a spring, and like any spring, when they absorb too much energy, they break. In this case, it’s usually caused by landing a jump wildly off balance, and running tips or tails vertically into the snow. It’s a drag, but it will also be immediately obvious.
When you apply pressure to the board in question, it should flex evenly end to end. If it has started to fold at a single point, your core is broken and you’re looking at getting some new gear.
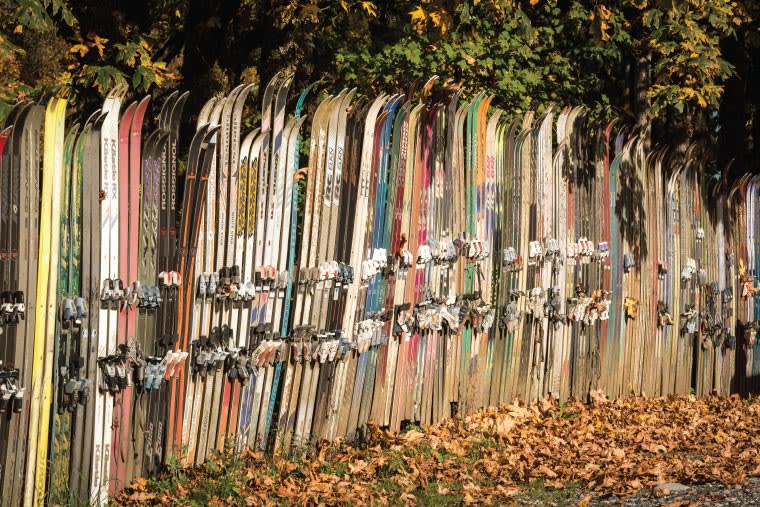
What to do With Your Old Skis or Board
Top Line: Get crafty
If your setup is ready to be decommissioned, what’s the right thing to do? While there’s an old tradition of using retired boards to stoke preseason bonfires, it’s probably best if you don’t burn anything that will release toxic chemicals into the air.
If your setup is ready to be written off, there are a handful of crafty ways you can give it new life. The easiest one, if you’re stoked on the graphic, is to designate it as wall art. Skis and snowboards can also easily be converted into benches, shelving, or if you have a large enough collection, fences.
And finally, for the party animals in our midst, there’s the time tested method of making a shot ski. Not only will it ramp up your next social gathering, it’s also common ground that’s all but guaranteed to bring skiers and snowboarders together.
Any of these is preferable to simply throwing out your old gear. But if you follow these tips, it should be a long while before that day eventually arrives.
About Campman
Campman is an outdoor retail store located in Salt Lake City, Utah, that specializes in gear and equipment for camping, skiing, backpacking, climbing, and everything in between. We understand that the difference between a bad memory and the adventure of a lifetime can come down to the gear you take with you when you head outdoors, and we want our customers to have the best experiences possible. When it comes to getting outside, we get it, and we’ll get you the gear you need to get there.
Questions? Feel free to contact us by phone at (801) 999-8117 or by email at sales@campman.com.
Share on: